How To Add Custom Fonts To Squarespace 7.1
As a brand and website designer I love it when I see someone completely branded on all platforms. Consistently using the same fonts and colors on all their graphics and social media. But what happens when you cant find your brand font in Squarespace? In that case we would need to upload our custom brand font into Squarespace using a little bit of code. We are going to show you how to easily use CSS to upload your custom font into your Squarespace site. Don’t worry we even included the code so all you have to do is copy and paste!
Are you more of a visual learner? Watch this short 5 minute YouTube video below where I walk you through it step-by-step.
Step 1: Uploading Your Font
Head over to the backend of your Squarespace site and click Design > Custom CSS then scroll right to the bottom and click Manage Custom Files
You'll see a button that says Add Images or Fonts.
Upload your font file here it should look something like this

Step 2: Add Your CSS
Now that you have your font uploaded we just need to add a little css to to be able to use and format them.
First copy and paste this code into the Custom CSS box:
// CUSTOM FONT
@font-face {
font-family: 'FONTNAME';
src: url();
}
Change font-name to the name of your font. For example I would change mine to Bon Vivant Serif.
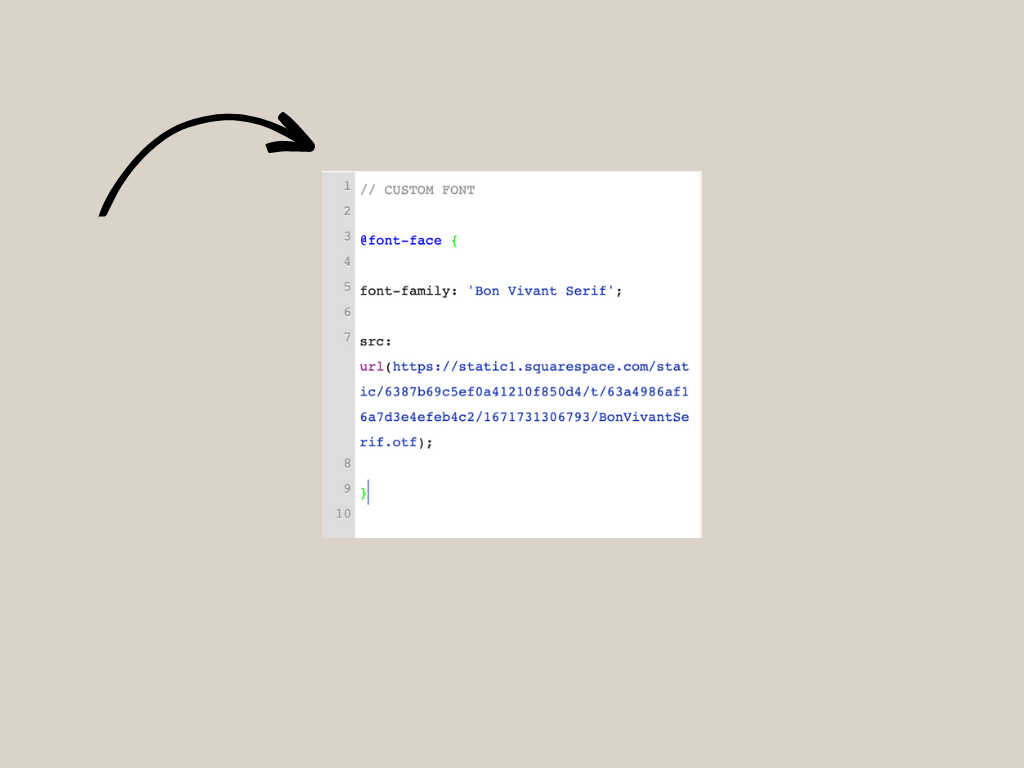
Now we need to update the font URL. To change the font URL you'll need to click in between the brackets where it says url().
From there click on Manage Custom Files again, and then click on your font file. As soon as you click on the file you will see a URL automatically pasted between the brackets. It should look something like this.
Make sure you hit save - you’re almost done!
Step 03. Customize your fonts/headings
Now that you have your font added in it is time to start customizing your headings. You can also customize your paragraph fonts if you would like.
Copy and paste the code below into the custom css box.
h1 {
font-family: 'font-name';
font-size: 20pt;
letter-spacing: 1px;
line-height: 140%;
}
Make sure that you update the font name. This code has now updated your Heading 1 font. You can also change the h1 to h2, h3 or P (heading 1, heading 2, heading 3 or Paragraph/Body text) as well using the same process.
If you want all of your headings to be the same font but you want them to be different sizes you would just copy and paste this same code and replace the h1 with h2, h3, or h4 and then update the formatting with the code by changing the size etc.
You should be able to see the changes take place immediately to whatever page you have up to the right of your custom css so that you can see what adjustments need to be made.
Which selectors to use for different fonts:
h1 = Heading 1
h2 = Heading 2
h3 = Heading 3
h4 = Heading 4 -
p = All Paragraph fonts
p.sqsrte-large = Paragraph 1 / Large Paragraph
p.sqsrte-small = Paragraph 3 / Small Paragraph
DID YOU FIND THIS POST HELPFUL?